This Tutorial will guide you through the process of running the short YAWL example workflow "Simple Make Trip Process". With the "Orderfulfillment Workflow" there is a more sophisticated example included in each YAWL installation (Path: /examples/orderfulfillment). It is assumed that you have installed YAWL successfully and the Control Center is running.

- Login to the Control Center (if the YAWL engine is locally installed - http://localhost:8080/resourceService) with the administrative account (Credentials: admin/YAWL)
- Select the tab "Cases"
- Select and upload the "Simple Make Trip Process" specification (Path: /examples/SimpleMakeTripProcess.yawl)
- The specification should appear in the "Loaded Specifications" box as on the following screenshot:
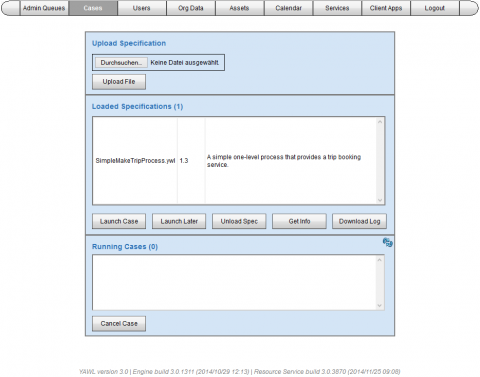
- Click "Launch Case" to start the workflow.
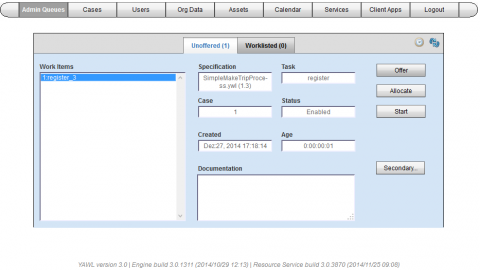
- Select the tab "Admin Queues"
- Because there is no organisational data loaded in YAWL the first task "register" appears as a work item in the "Unoffered" queue. These work items are net yet assigned to any participant.
- The administrative user account can not be used to actually perform work. Therefore we need to create at least one participant, who performs the work.
- Because there is no organisational data loaded in YAWL the first task "register" appears as a work item in the "Unoffered" queue. These work items are net yet assigned to any participant.
- Select the tab "Users"
- Create a new participant by clicking on the "New" button.
- Fill in details as in the following screenshot (Password: test)
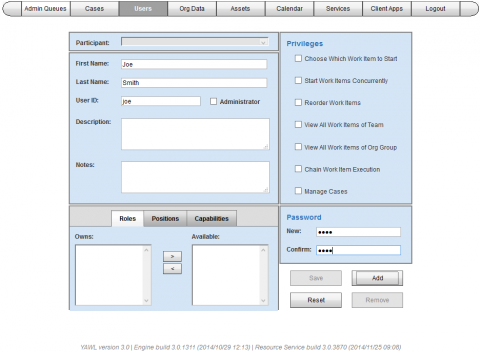
- Click on the "Add" button to save the participant. There will be a warning message about missing role, position and capability that can be safely ignored.
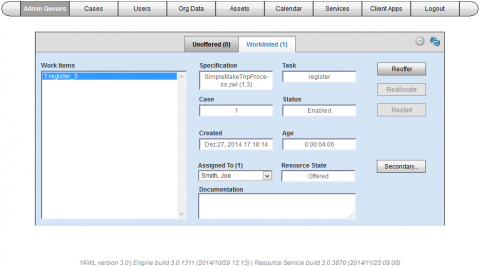
- Return to tab "Admin Queues"
- Select the work item "register" and click on the "Offer" button.
- Now a list containing the just created user John Smith will appear. Select John Smith and proceed to put this work item into his offered queue.
- Logout the administrative user and Login as Joe Smith (Credentials: joe/test)
- The work item "register" should appear in Joes "Offered" work queue.
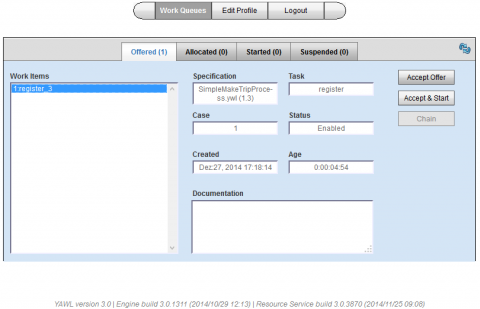
- Click the "Accept & Start" button to immediately move the work item to the "Started" work queue, skipping the "Allocated" work queue. You may also click "Accept" to move the work item to the "Allocated" work queue and perform your work later on.
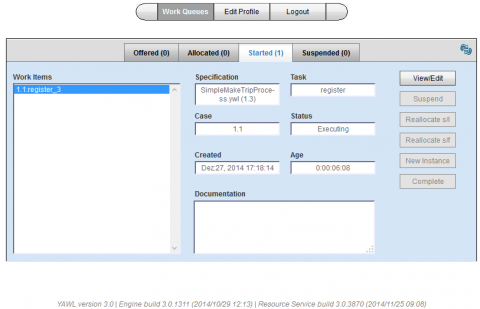
- If you click on the "View/Edit" button a page with the work item appears.
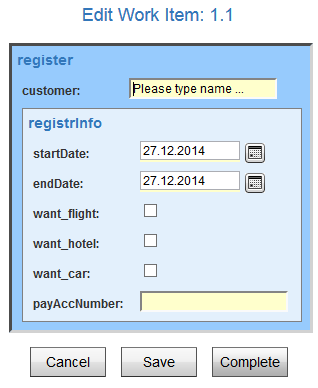
- Fill out the form as you like and click the "Complete" button to check-in the work item back into the YAWL Engine. Due to the AND-Split of the "Register" task the YAWL Engine now instanciates three tasks: "book flight", "book car", "book hotel"
- The work item "register" should appear in Joes "Offered" work queue.
- Logout Joe Smith and login as the administrative user


- All three work items should be in the "Unoffered" work queue. Now you should be able to complete the whole workflow on your own. Simply assign all work items to Joe Smith, fill out the forms and complete them. Afterwards look for the "pay" work item in the "Unoffered" admins queue and repeat the steps. If the "Running Cases" box on the tab "Cases" is empty you have just completed your first YAWL workflow.